Relax soldier, Paris has fallen. You deserve a rest!
Force Grubber versus Hades Rangers in an armoured engagement
Axis Forces:
Captain Bryan Talbot, leading Force Grubberfought an armoured engagement against...
Allies Forces:
Private Daniel Talbot, leading Hades RangersResult: Axis victory!
Training Wheels
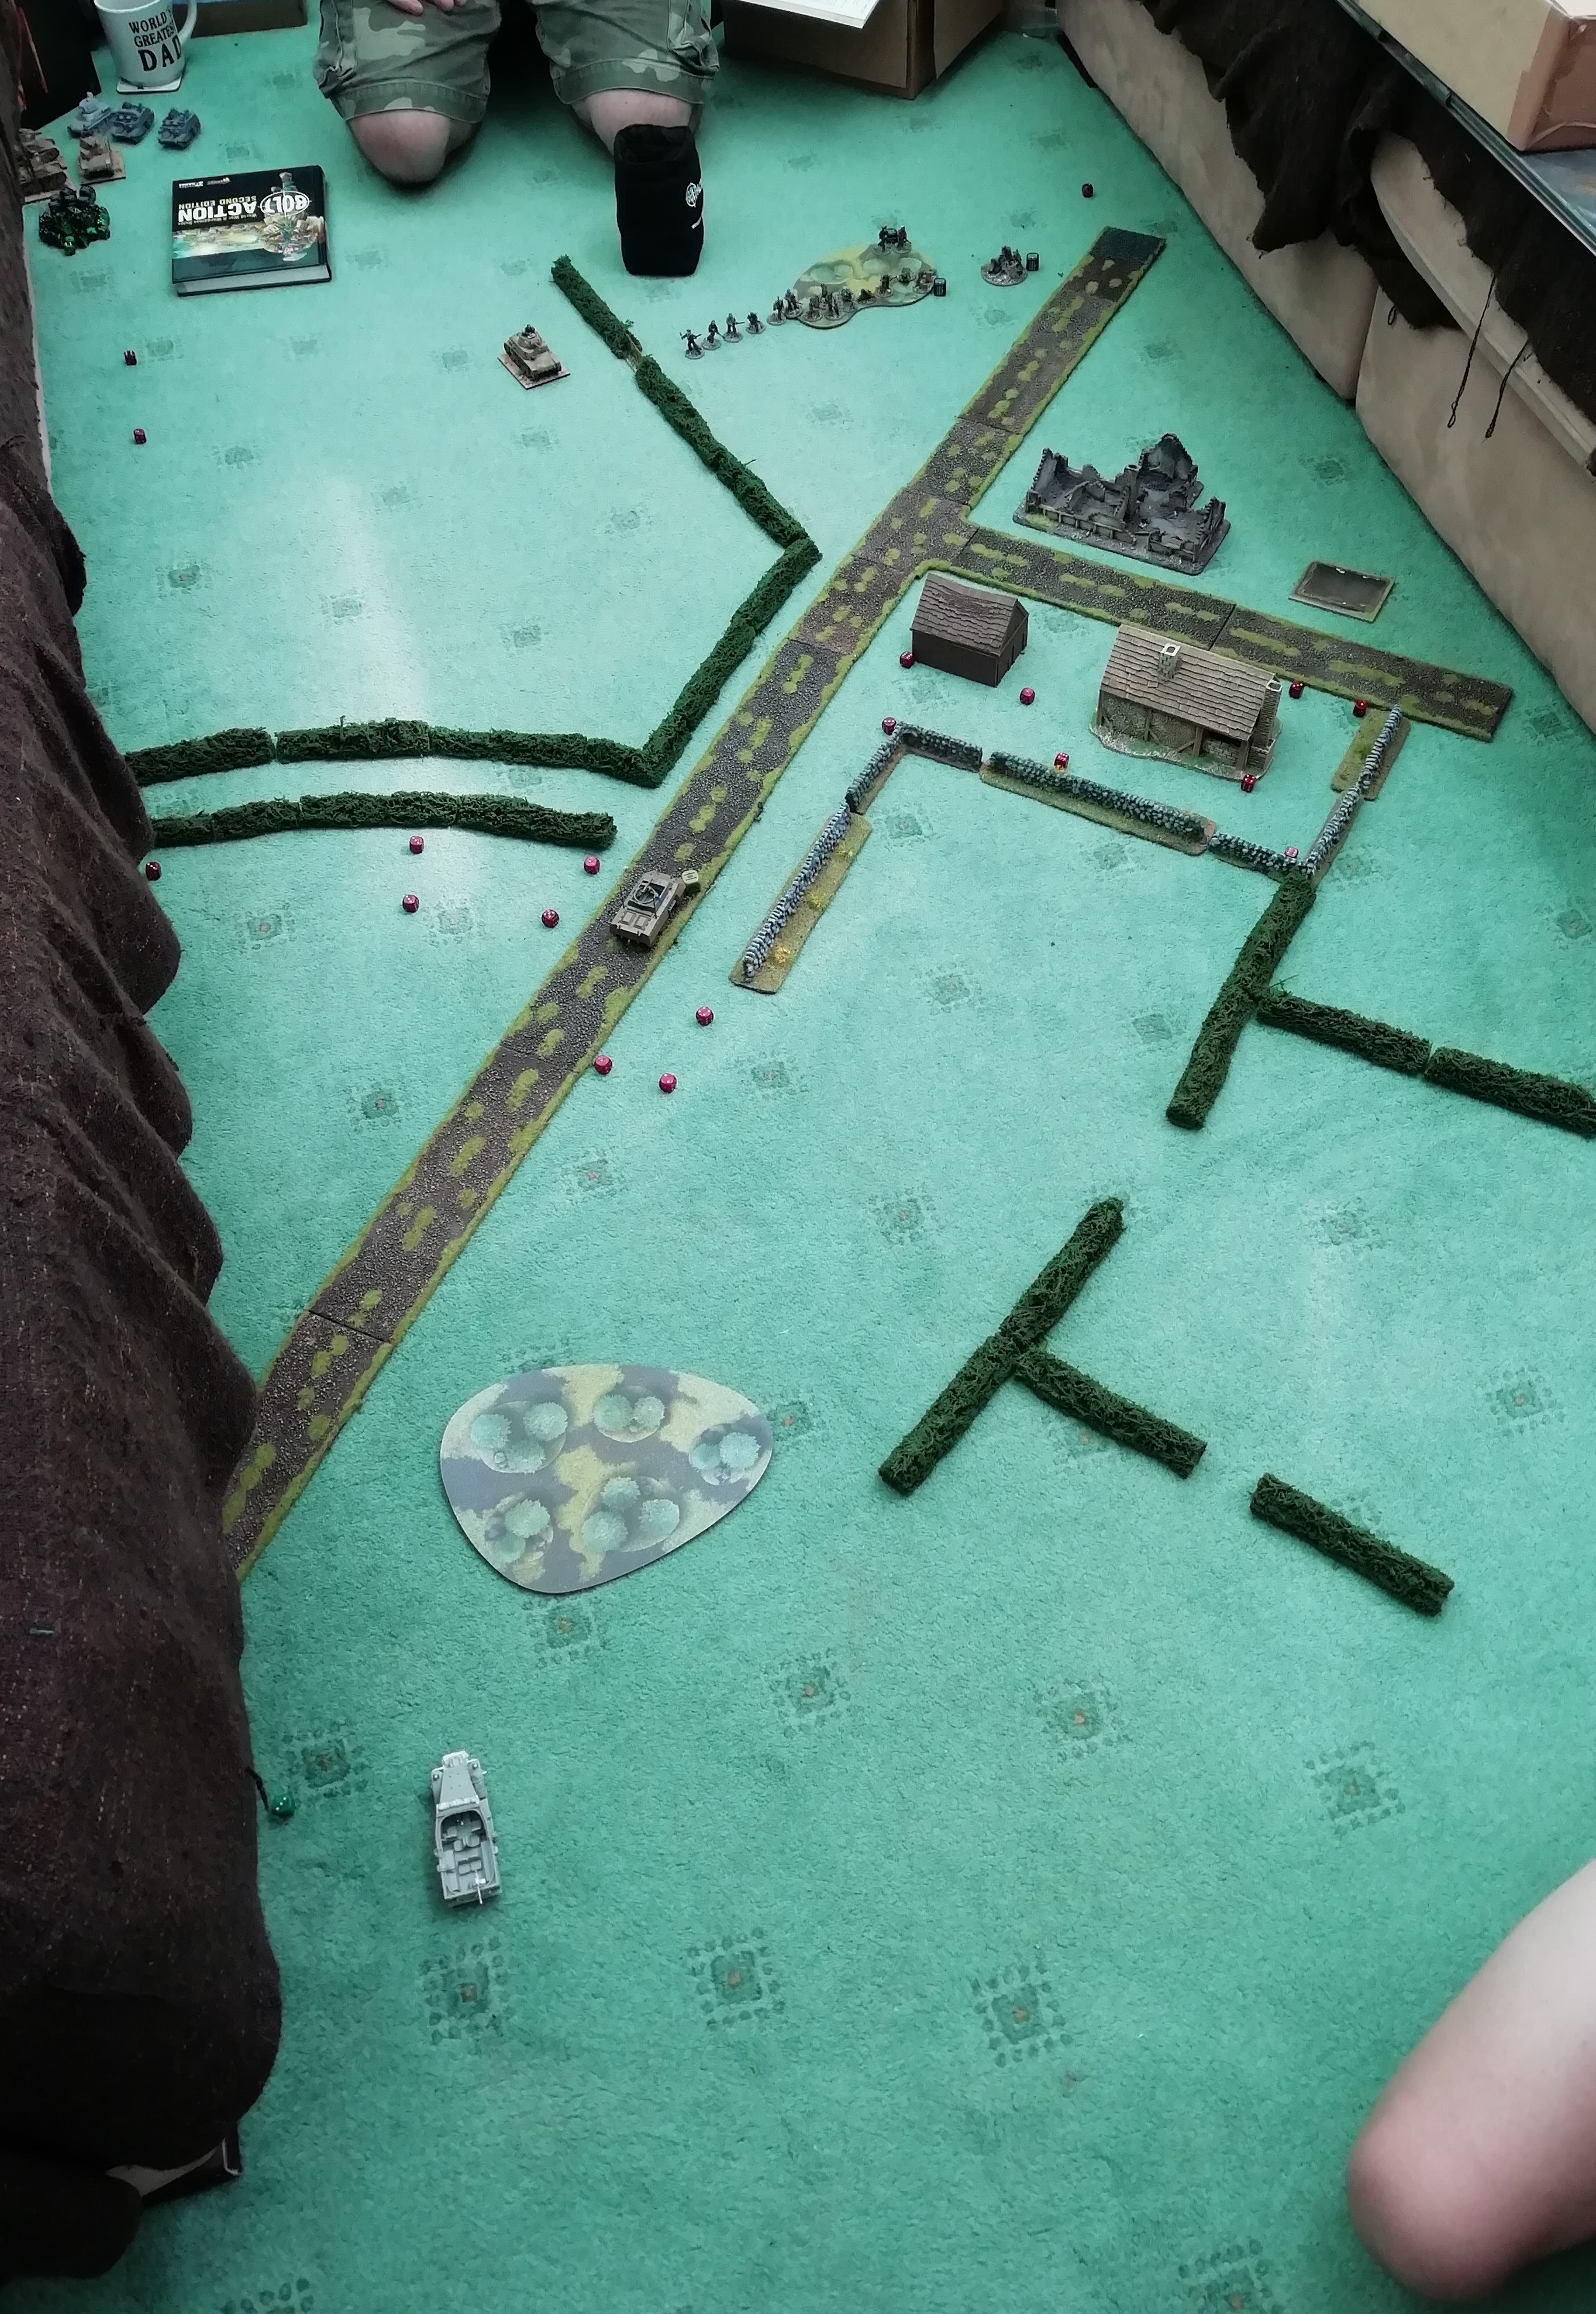
The wargaming table was set up as closely as possible to the online pdf map, however as was to be noted a slight omission was to be observed by the Allied Forces looking to break out of the beach head landing zone.
At the initial deployment the Allied player positioned his 1# M8 Greyhound and the M3 Scout Car to the near left corner of the map, so as to be as near as possible to the road way. In contrast the Axis player deployed the initial #1R35 Command Tank within the Bocage enclosed area, and the remainder of the infantry units (the Officer + assistant, the sniper team, the medium mortar and the green squad in the wooded area to the far right of the map to wait in ambush for anything moving along the roadway.
The first turn: the 1#M8 advanced forward along the road with the M3 immediately behind, this was fired upon by the Axis mortar (using over the barrel technique) but they missed. The Allied forces were now alerted to the enemy presence. The #1R35 advanced up to the Bocage boundary taking a run move.
Turn 2: The Axis mortar fired at the lead 1#M8 which was unable to use its Recce ability as the M3 was blocking it from reversing. The mortar hit causing 4 pin markers and stunning the crew. The 1#M8 was set to down on the dice. The #1R35 fired at the pinned M8 and punching a hole through the front armour easily destroyed it, leaving a burning wreck in the middle of the road. The M3 decided to reverse backwards, turn 90 degs and drive with all haste across the open field. The Axis player then tried but failed to call up the first veteran #2R35 but failed. The order was received by #3R35 and #4R35 who charged across the field towards the hedgerow boundary. The two Renault FTs also deployed in the wooded area and cautiously moved forward under cover of the Bocage hedgerow. The Allied player called up a Veteran 2#M4A3 tank and moved this along the roadway closing the gap to the wrecked 1#M8. The remaining Shermans and the 2#M8 deployed along the bottom right corner of the map and exploited the gap were the minefield had not been fully laid out to meet the side road, by charging ahead.
Turn 3: The Sherman 2#M4A3 tried to move past the wrecked M8 and instead of pushing it out of the way it strayed into the minefield and set off two mines, both penetrated the soft under belly of the Sherman, the first mine stunned the crew and the second immobilised it and damaged the turret traverse mechanism. Noting this Sherman was no vulnerable; the mortar fired over the barrel and scored a direct hit setting the engine on fire. The #4R35 advanced to the hedgerow line, fired and punched a hole through the frontal armour of the Sherman with a really lucky hit completely knocking it out altogether. In response the M3 continued its move across the open field much the displeasure of #1R35 who was still reloading at the time. Once reloaded, but too late to hit the M3 as it disappeared behind the Bocage across the road, the #1R35 instead fired at the Command Sherman, at distance and successfully hit it but did not penetrate casing a pin marker. Meanwhile #3R35 advanced to the hedgerow and set to ambush, and #2R35 advanced on to the battlefield and charged across the field to join his comrades. The rest of the infantry units remained in ambush.
Turn 4: The Allied 2#M8 advanced around the minefield on to the side road and turned off attempting to hide behind the nearest house ruin – it was hit by the #3R35 which successfully immobilised it, the veteran status of the crew clearly showing by its superior shooting skills. The Command Sherman unluckily failed its orders test and stayed put this turn, this caused the 3#M4A3 to be bottlenecked behind it and so being ineffective this turn. The two Renault FTs closed on the stricken 2#M8 to apply further pin markers but exposing themselves to the fire of the Shermans while the rest of the R35s repositioned to be able to fire at the Shermans next turn. The M3 Scout Car was also bottlenecked behind the two Shermans. The mortar fired at the stricken M8 but missed.
Turn 5: The R35s all fired on the Command Sherman, but only two hit and none penetrated causing more pin markers. The Command Sherman managed to activate and turned and proceeded on to the side road exposing its side armour to the R35 but they were all busy reloading at this point. The mortar team, again firing over the barrel scored a direct hit on the immobilised R35 knocking it out and setting it ablaze. The remaining Sherman moved forward to follow the Command Sherman also exposing its side armour, closely followed by the M3.
Turn 6: The #1R35 fired at the exposed M3 and blew off its front wheels thereby stunning the crew and the Ranger team within. The remaining four R35s all fired at the Command Sherman and hitting the side armour, two penetrated and managed to set the tank on fire, then with the closely followed second shot blew the turret right off the tank..!! The remaining Sherman moved past the former commander’s tank and towards the exit area, but noticed one of the Renault FT and easily destroyed it with one shot killing the crew. The remaining FT moved as if to hide behind the ruined house. The mortar team fired at the M3 but missed.
Turn 7: The remaining Sherman advanced towards the exit with no less than five shells from the R35s bouncing off its side armour, but all adding pin markers. The Ranger team believing the M3 was now a death trap attempted to exit the immobilised vehicle and on so doing run straight into the ambush set by the Green Grenadier squad. A long burst of gun fire from both MG42s was to be heard amidst the noise of the battle and two Rangers fell dead, the remainder diving for whatever cover was available. The mortar team fired again and destroyed the M3 Scout Car with another direct hit. The remaining Renault FT moved to reposition away from the Sherman.
Turn 8: The last Allied vehicle on the table, turned and killed the mortar team with a long burst from the hull mounted .50 cal MMG, while also firing, hitting and destroying the last Renault RT outright. The R35 all advanced the reposition then on firing all missed the remaining Sherman. The Grenadier Squad maintain the same position fired on the Ranger squad with the MG42s and caused enough pin markers to remove them from the game.
Turn 9: The last remaining Allied asset made its orders test and raced off the table via the exit as opposed to standing and fighting the rag-tag hastily put together misfits of the Heer reserves.
Overall the Axis team scored a total of 8 points, 5 for the Sherman command vehicle and 3 for the other Sherman. The Allied player scored 3 points for the remaining Sherman exiting the battlefield. The limiting factor of the R35 with its main armament was noticed with the